Laserfiche Live Event Viewer
The Laserfiche Live Event Viewer, accessed from the Subscribers or Repositories nodes of the Workflow Administration Console, shows all events occurring in the specified repositories on the Laserfiche Server in real-time.
Note: Users must have the Modify Settings permission in order to add, delete, or modify monitored repositories.
- To open the Laserfiche Live Event Viewer, select either the Subscribers or Repositories node in the Workflow Administration Console, and click Show Laserfiche Live Event Viewer in the Actions Pane.
- In the Login to Laserfiche dialog box, select to login with Windows Authentication or Laserfiche Authentication. If you select Laserfiche Authentication, enter the user name and password of a Laserfiche user with sufficient rights to view the repository listed at the top of the dialog box.
- The Laserfiche Live Event Viewer will display all the events on the Laserfiche Server that are occurring while the viewer is open. All the events will be cleared if you close and reopen the viewer.
To view the events for additional repositories
- Select File from the main menu.
- Select New Repository.
- In the
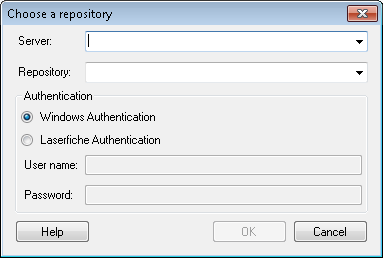
 Choose a repository dialog box, type the name of the Laserfiche Server that the repository is on. Alternatively, choose the Laserfiche Server from the drop-down menu.
 - Next to Repository, type the repository's name or choose it from the drop-down menu.
- Select to login with Windows Authentication or Laserfiche Authentication. If you select Laserfiche Authentication, enter the user name and password of a Laserfiche user with sufficient rights to view the repository listed at the top of the dialog box.
- Click OK.
- In the Laserfiche Live Event Viewer, click the tab named after the repository you added to view events in that repository.
To only display specific events
- Select Filter from the main menu.
- Point to Events, User Name, Entry ID, or Entry Name.
- Select, or enter in the text boxes, criteria to filter the events by.
- Optional: Click Restore to Default to return to the default filter settings in which all events are listed.
- Optional: Click Pause to stop the flow of events coming in.
Note: Changing the filter settings will only apply to new events and will not affect the events already shown in the Live Event Viewer.
To clear all events
- Select File from the main menu.
- Select Clear all events.
- Optional: To clear all events and close the repository's tab, select Close Tab.